CryptoProcessing allows you to safely accept crypto payments through a crypto payment gateway, convert them into fiat, and withdraw funds to a bank account. The merchant wallet in CryptoProcessing serves as your control center for managing payments.
The guide here will walk you through the flow step by step, describing how to accept crypto using deposit addresses and payment links.
1. View all currencies in your merchant wallet
After login you land on the Balances tab of the merchant wallet. The screen shows every currency available for your account in one table, for example, USD, EUR, Bitcoin, Ethereum, USDC, Ripple, or Solana.
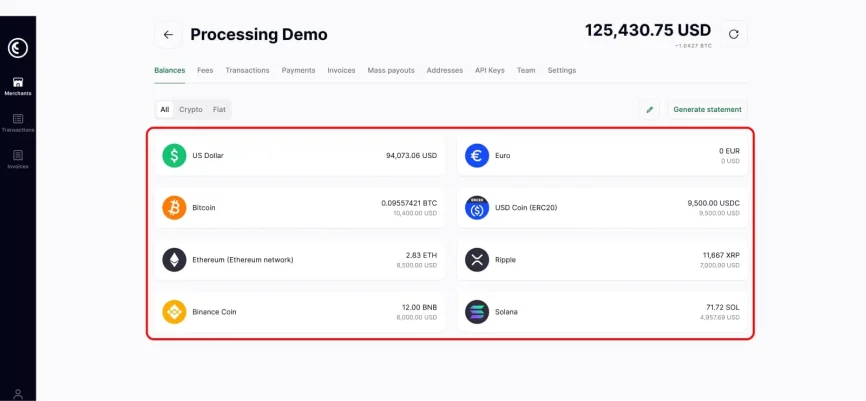
Next to each asset, you see the balance and its value in your main reporting currency.
Use this view to verify that your wallets appear correct before creating new addresses or invoices.
2. Open the Receive form for the currency you need
Select the currency you want to work with and click it to view the available options.
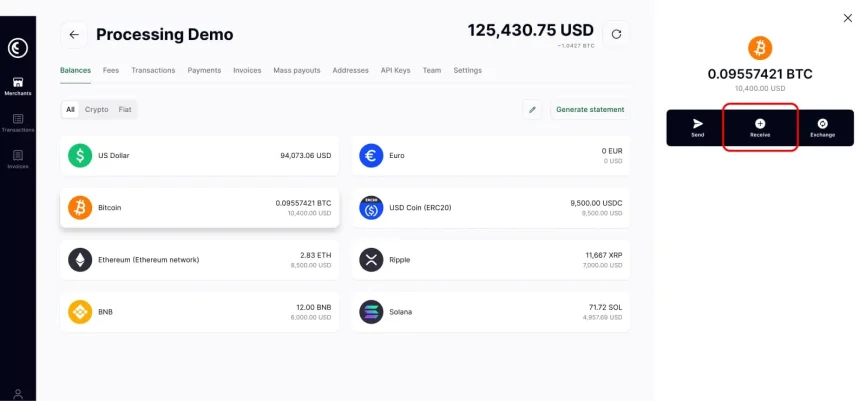
In our case, we’re using Bitcoin from the Balances list. A panel opens on the right with three actions: Send, Receive, and Exchange. Choose Receive to accept a deposit.
This action brings you to the deposit details for that asset.
3. Review your deposit address
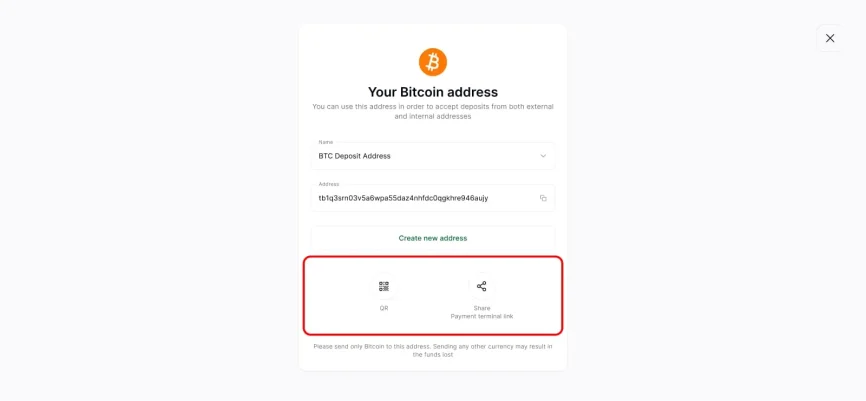
You now see the screen titled “Your Bitcoin address”. It includes a name field, for example, “BTC Deposit Address”, and the actual deposit address below.
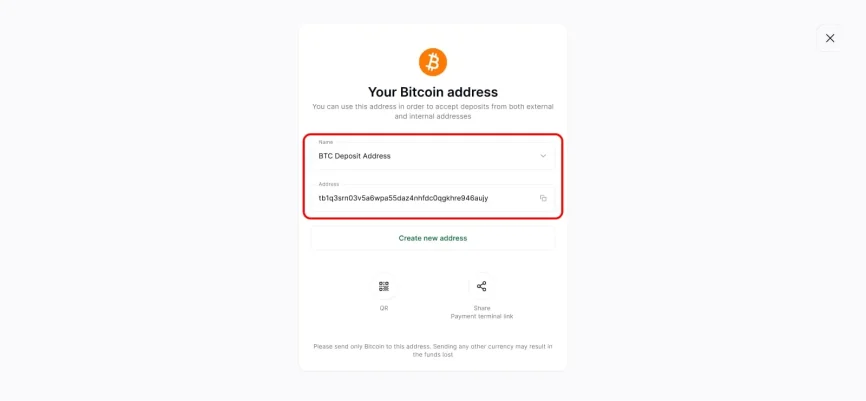
On this screen, you can:
- Use the name field to label the address for a project, client, or channel.
- Copy the address by clicking the icon next to it.
- Use this address for incoming transfers from exchanges, wallets, or internal accounts.
At the bottom of the form, you can find buttons for a QR code and a payment terminal link. These are ways your customers can quickly pay you.
4. Share the address by QR code or payment terminal link
When you’re ready to process the payment, open the QR option. The customer can scan the code and fill in your wallet address automatically.
For PoS payments choose the payment terminal link. Both methods send funds to the same address in your merchant wallet.
5. Create new addresses for different business needs
Many merchants prefer separate addresses for each client or payment flow. On the “Your Bitcoin address” screen, click Create new address to add one.

You can create:
- A standard address that receives deposits in the original currency.
- An address with exchange that converts every incoming payment to another currency.
The next step will explain the second option.
6. Use an address with automatic exchange
An address with exchange helps you easily convert assets and keep accounting simple. On this screen, you choose a name, for example, “BTC + USD Deposit Address,” and select the target currency, such as the US Dollar.
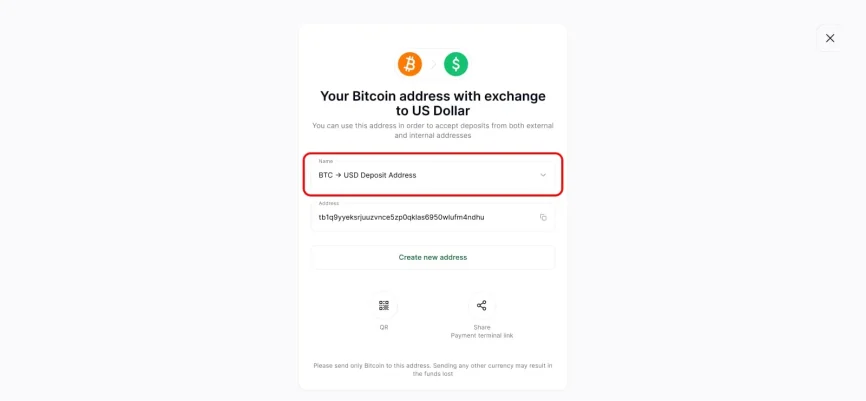
Your customer will send BTC to this address. CryptoProcessing converts the deposit to USD and credits your USD balance. The system locks in the exchange rate at the time of payment so you receive the exact amount you expect, without extra volatility.
You can still view every deposit in your reports and transaction history, showing both the crypto amount and the final settlement currency.
7. Create a crypto invoice from the Invoices tab
When you need the customer to pay a specific amount, use a payment request instead of a raw address. Open the Invoices tab in your merchant wallet. The screen lists existing invoices with their status and amounts. On the right, you will see a green button labeled Create payment request.
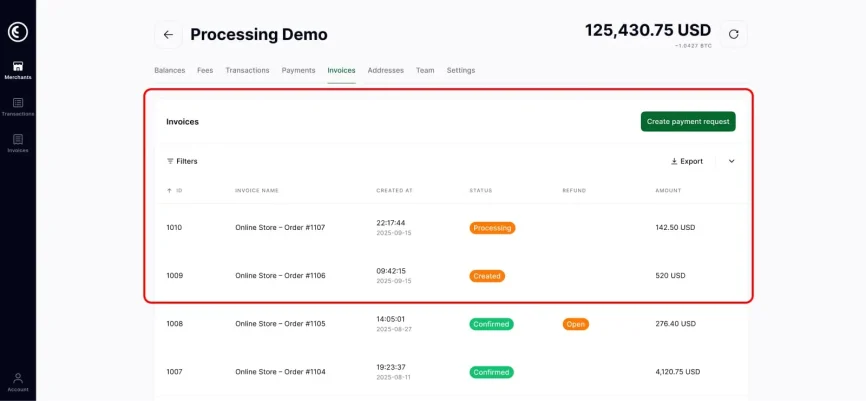
To create a new invoice:
- Click Create payment request.
- Fill in the amount, for example 520 USD.
- Add a description such as “Service payment to merchant wallet”.
- Choose the settlement currency and other parameters.
- Confirm the invoice.
The invoice appears in the list with its own ID and status.
8. Copy the payment link and send it to the customer
After you create the invoice, a confirmation window shows the payment link. Copy this link using the icon next to it.
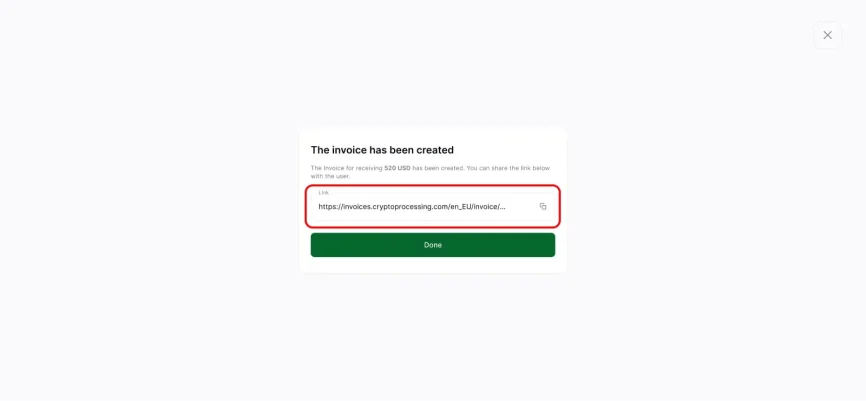
Share the link through your normal communication channel. You can paste it into a billing email, a support ticket, or a message in your CRM. The customer only needs this link to start the payment.
9. What the customer sees when paying the invoice
Once the customer opens the link, they land on a hosted payment page operated by CryptoProcessing. The page shows the invoice ID, description, and the amount you set. It then lets the payer select which currency they want to use for payment, such as USDC on the ERC20 network.
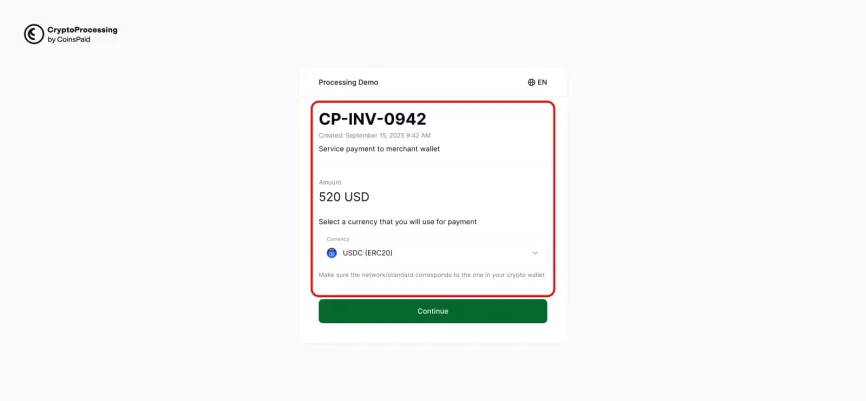
The form displays clear instructions, including a reminder that the network in the wallet must match the network shown on the page. After the customer confirms, they can send the funds from their wallet.
CryptoProcessing tracks the blockchain, confirms the payment, and updates the invoice status in your Back Office. The system can convert the received crypto into your chosen currency or fiat, then credit your merchant wallet.
Accept crypto through CryptoProcessing
You can see how fast and simple the crypto payment flow can be. Generate a deposit address or invoice, share a link or QR, and your customer pays in seconds. From there, you control exchange, reporting, and withdrawals from a single merchant dashboard.
Crypto adoption continues to grow, with hundreds of millions of people worldwide owning cryptocurrencies and tens of millions using mobile wallets. Accepting crypto lets you reach these users and offers them a simple way to pay.