
A crypto wallet is the place where your digital assets live. For a business, it acts as a hub to accept payments, hold funds, pay partners, and move money to bank accounts.
The guide below provides an overview of all the important elements of your crypto wallet and various common operations.
1. See all balances in one place
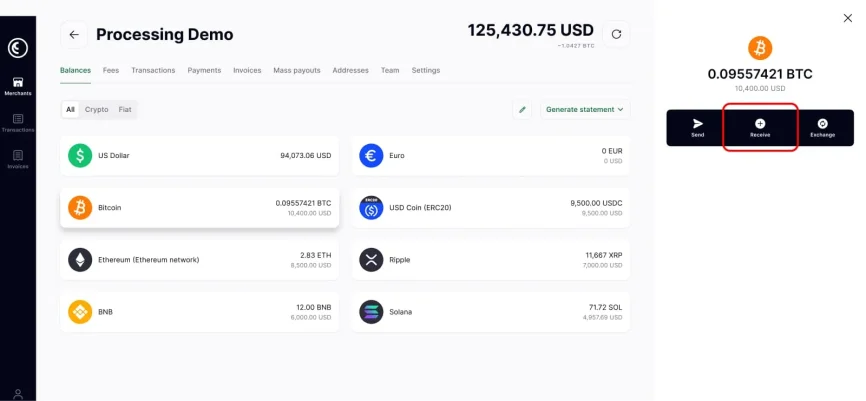
After logging in, you arrive at the Balances tab. Here you can see:
- Total balance in your main reporting currency, for example, USD or EUR
- A list of every asset on the account, such as Bitcoin, Ethereum, stablecoins, and fiat wallets
- Real‑time values, so your team always knows how much the business holds
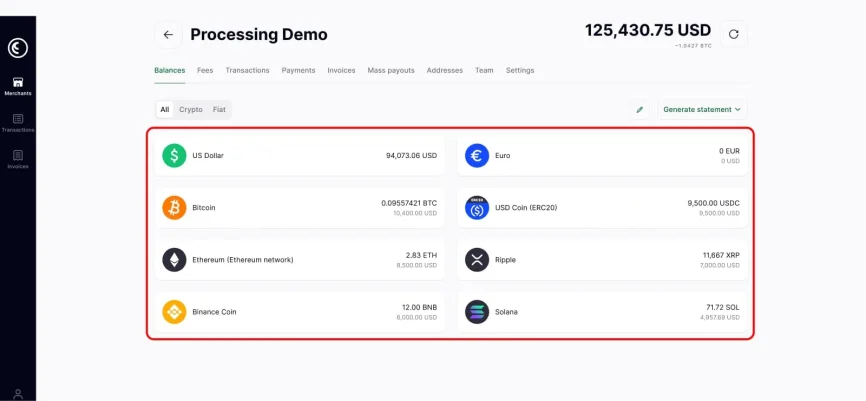
This screen is your starting point for all actions: sending, receiving, exchanging funds, and building reports.
2. Pick the currency you want to manage
To work with a specific asset, click on it in the balances list. In our case, the example asset is Bitcoin (BTC). A side panel opens with three actions: Send, Receive, and Exchange.
- Send – pay a partner, supplier, or another wallet
- Receive – share a deposit address for incoming funds
- Exchange – convert between currencies without leaving the wallet
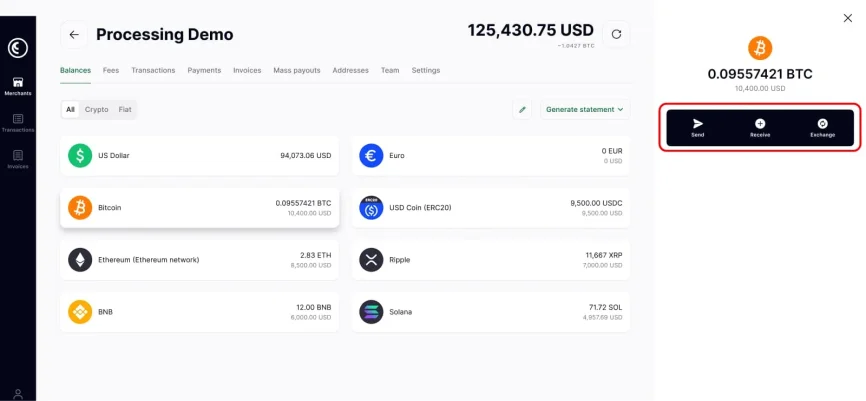
The next sections explain each of these actions in more detail.
3. How to send crypto
Use this flow to pay invoices, settle with affiliates, or move funds between your own wallets. A crypto business wallet is built for these operations and supports transfers in multiple cryptocurrencies.
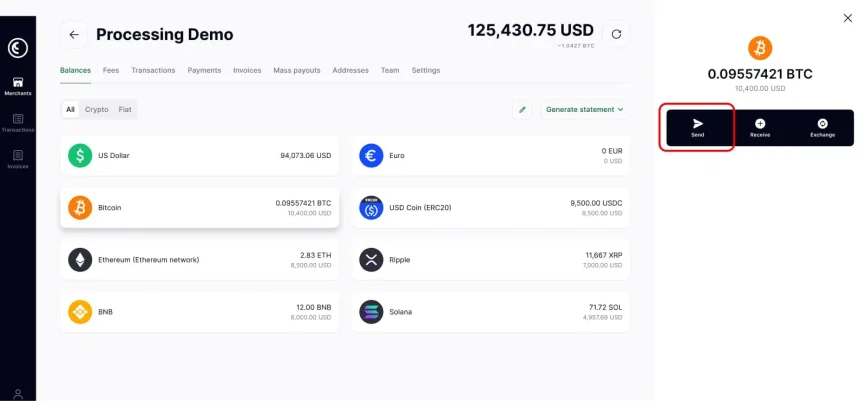
Steps to send crypto from your CryptoProcessing wallet
- Open the Balances tab and click the asset.
- In the right panel, click Send.
- Paste the recipient address into the address field.
- Choose the network from the list that matches the address type.
- Enter the amount you want to send. You can check both the crypto amount and its value in your reporting currency.
- Review the network fee and the total that will leave the wallet.
- Click Continue and confirm the transaction.
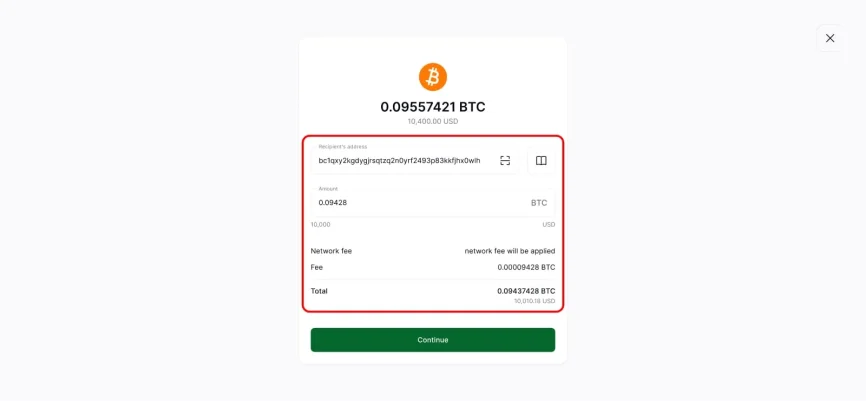
After confirmation, the payment appears in your transaction list immediately, along with its status and blockchain details. Crypto payments settle nearly instantly, regardless of the recipient’s location.
Need more details? See our guide on sending crypto payments with a breakdown of all the steps involved.
4. How to receive crypto
Receiving funds is just as simple. Use this flow for deposits from exchanges, payments from clients, or internal transfers from other wallets.
Steps to receive BTC into your wallet
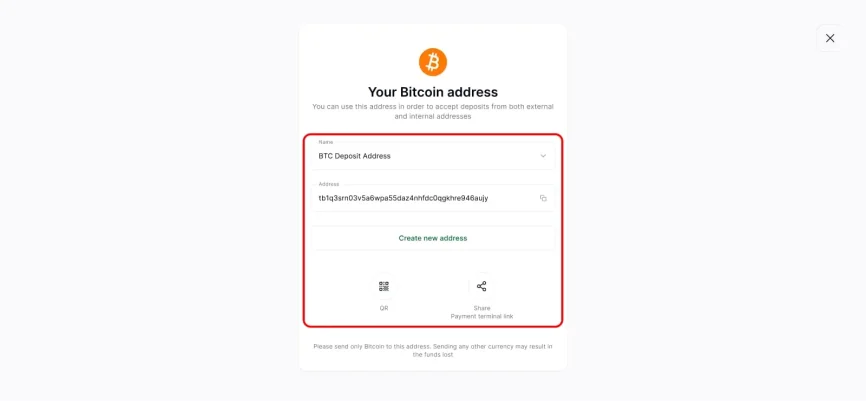
- Open the asset from the Balances tab.
- Click Receive in the side panel.
- You see the “Your address” screen with:
- A name field, for example, “BTC deposit address”
- The deposit address itself
- A button to create a new address if you need a separate one for a new client or purpose
- Copy the address or use the QR code and share it with your client or partner.
- Once the transfer is confirmed on the blockchain, the amount appears in your balance and in the transaction list.
Need more details? See our guide on accepting crypto payments with a breakdown of all the steps involved.
5. Exchange crypto inside your wallet
Market moves can affect your margins. Many merchants receive payments in one currency and store value in another, for example, converting BTC to USDC or EUR.
The Exchange action in the wallet lets you do this without having to go to external websites.

Steps to make an exchange
- Open the asset you want to swap and click Exchange.
- In the Spend column, pick the asset and amount you want to convert.
- In the Get column, pick the target currency, for example, USDC or USD.
- On the Confirm panel, review:
- The amount you spend
- The amount you receive
- The exchange rate and fee
- Click Exchange to confirm.

The conversion completes inside your wallet. CryptoProcessing freezes the exchange rate at the moment of confirmation, so you receive the exact amount shown on screen and avoid extra volatility. The “Not happy with rate” button is there to report any potential discrepancies with the market price.
6. Generate clear financial statements
Finance and compliance teams require accurate and up-to-date records. The wallet allows you to produce them in just a few clicks.
On the Balances tab, you see a Generate statement button. It opens options for Balances, Fees, and Cashflow reports.
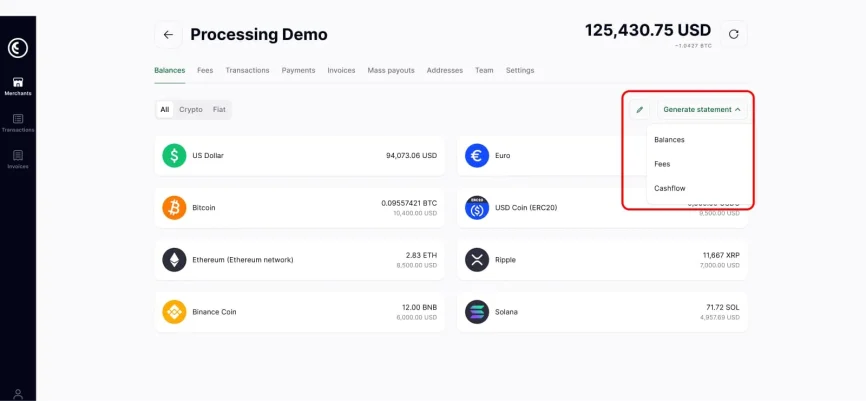
- Balances report – wallet balances for a selected date range
- Fees report – all network and service fees
- Cashflow report – inflows and outflows by asset
These reports are similar to the flows used in traditional finance to help streamline your operations.
7. View and export every transaction
The Transactions tab displays the complete history of transactions on your account.
On the left, you see a table of all deposits, withdrawals, exchanges, and other operations. Each row includes an ID, date, payment type, status, and amount.
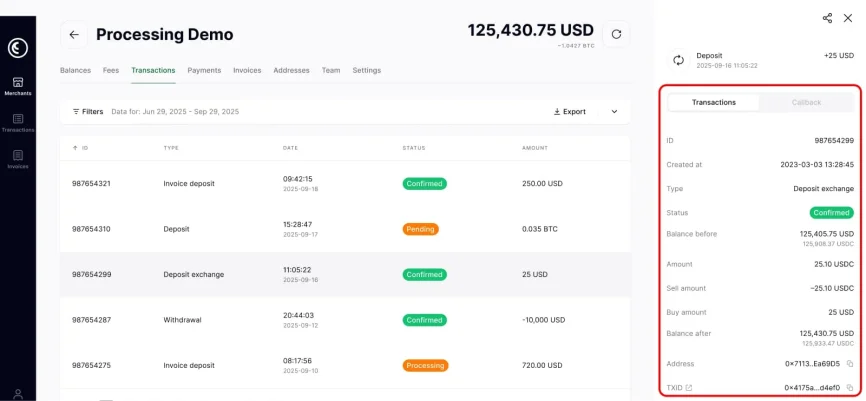
Click any row to open the detailed view on the right. This panel shows:
- Full transaction ID
- Creation time and status
- Amount and fee
- Balance before and after
- Address and transaction hash
To work with this data in your own tools, click Export in the upper right corner of the Transactions tab.
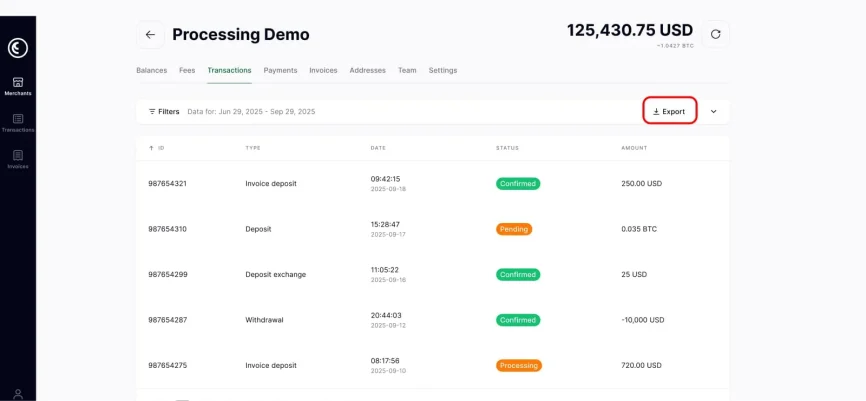
The system will generate a file that you can pass to your accountant or import into internal reports. Accounting for crypto transactions isn’t dissimilar to traditional accounting and can slot into most systems with minor adjustments.
8. Manage your team
A business wallet supports more than one user. CryptoProcessing includes a Team section for managing access.
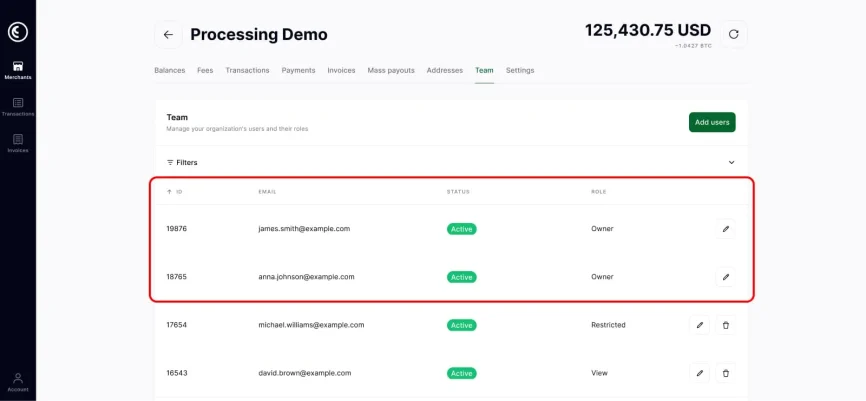
Here you can:
- Add new users from finance, accounting, compliance, or management
- Assign roles such as Owner, Restricted, or View
- Control who can approve transfers, who can only view data, and who can change settings
Unlike a regular cryptocurrency wallet, a business wallet features multi-user access and permission control, making it safe to share across departments.
9. Set withdrawal limits
To help mitigate the risk of human error or compromised accounts, the wallet offers flexible withdrawal limits.
In Settings → Withdrawal limits, you can view default limits per operation, per hour, and per day. You can also add custom limits for specific currencies.
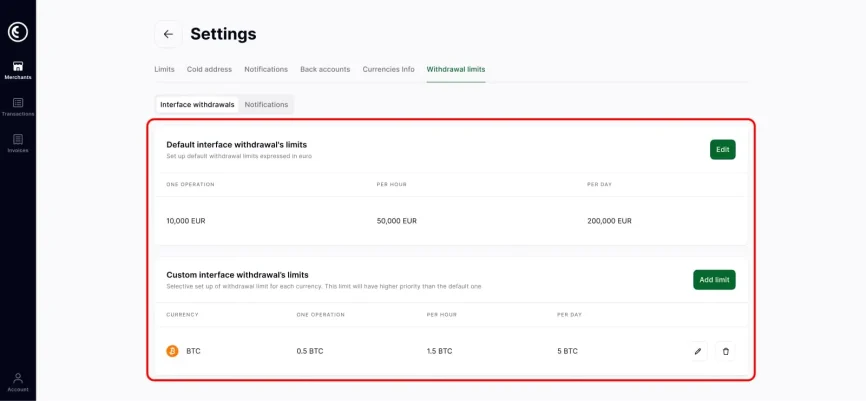
Examples:
- Cap a single BTC withdrawal at the fiat equivalent of 10,000 EUR
- Restrict total hourly withdrawals
- Set a low limit for test currencies and a higher one for main settlement coins
These controls provide management with a clear framework for large transfers and align well with internal approval policies.
10. Get balance notifications
To create balance alerts, head to Notifications inside Settings. This section lets your team set email triggers for key events.
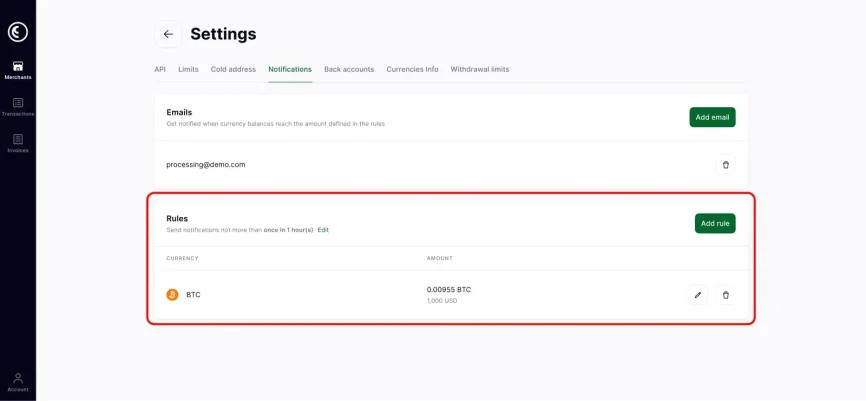
You can:
- Add one or more email addresses for alerts
- Create rules for each currency, for example “send a message if BTC balance goes below X”
This helps the team react quickly to large withdrawals, new deposits, or funding needs and prevents missed events on busy days.
Start welcoming customers who pay in crypto
With the CryptoProcessing business wallet you can:
- Accept crypto from clients and partners
- Hold, send, and exchange funds in 20+ cryptocurrencies
- Keep clear statements, exports, and transaction records for every audit
- Control access with roles, limits, and notifications
Connect your business to crypto and link it to a business wallet that your team can control with confidence!